Tuesday, 29 April 2014

Step by Step tutorial for downloading your Facebook data (with snapshot)

Steps for downloading your Facebook data are as follow

Step 1. Login to your Facebook Account, then click on little arrow in the top right and select Setting.


Step 2. Now you will be landed on General account setting Page, at the bottom of this page you will find "Download a copy of your Facebook Data". Click on that Link for downloading your Facebook data.


Step 3. Clicking on that link will take you to Download your Archive Page. click on Start My Archive.


Step 4. Allow permission to Download your data and then Facebook give you a prompt with the following message.


Step 5. Click Okey. When Facebook complete your archive, you will get an email from Facebook with a link containing all your Facebook data. Download that data by clicking on Link.....Enjoy.

Saturday, 26 April 2014

How to Permanently Delete a Facebook Account

If you deactivate your account, your Timeline disappears from the Facebook service immediately. People on Facebook won't be able to search for you, though some info, like messages you sent, may still be visible to others.Facebook also save your Timeline information (ex: friends, photos, interests) in case you want to come back.

If you don't think you'll use Facebook again, you can request to have your account permanently deleted. Please keep in mind that you won't be able to reactivate your account or retrieve anything you've added. Before you do this, you may want to download a copy of your info from Facebook. Now if you'd like your account permanently deleted with no option for recovery than follow the following steps:

Step 1: Save all of your Data before deleting your account:

Before deleting your account you may like to save your pics, messages and contact information. You will not have any access when you delete your Facebook account. Facebook allow you to download a copy of all of your Facebook data. For this you can read "how to download your Facebook account data".

Step 2: Clear Your Facebook History

Facebook keeps a record of everything you search for on its Web site.Each time you look for a friend, business, or personality on Facebook, it gets saved to your search history.If you want to limit some of the information Facebook is keeping about you, or just tidy up the list, it's just a few clicks away. For this you can read "How to Delete you Facebook Search History".

Step 3. Visit the Delete account page

now you are ready for deleting your Facebook account. Firstly Login to your & follow the following steps
     1. After login to your Facebook account click on this Link.


     2. Now click on "Delete My Account" Button. It will ask you with a prompt with Permanent Delete Account, Click Okey to move forward.


3. Now it will redirect you to page where you need to enter your Facebook password and fill one captcha.


4. Now after entering detail it will take you to page as shown below. Actually it take 14 days to delete your account, within those days you can also recover your account by entering your credential and canceling the request.


Thursday, 3 April 2014

How to find website ip address

Each Web site on the Internet possesses at least one Internet Protocol (IP) address. Knowing a Web site IP address can be useful to determine its physical location and other interesting information about that website , but this address is not automatically shown in Web browsers. How can you find the IP address of a Web site. 

Many times you want to know ip address of website.There are many ways to obtain and use a website's IP address. 

First Method: Using Command Prompt

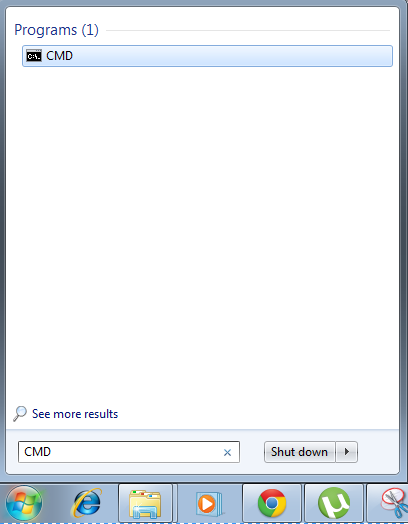
Step 1. Go to start button and type CMD or press Windows +R.


Step 2. Once command prompt window will open , type ping website address.
For Example : ping www.google.com


Step 3. As you can see on ping response it give you the ip address for that website. 
For example : ip address for Google in my case is 173. 194.36.52.

First Method: Using Online Service

Step 1. Go to website http://www.getip.com/.


Step 2. Now enter web address of website whose ip address you want to find out.


Step 3. Now click on Get site info, now you can see ip address and country detail for that website.


That's it for this tutorial. Enjoy...:)

How to trace an ip address or website address

Do you want to find out someone's IP address or some website address? it's not that hard to do, for that you just need to have an internet connection.  If you don't know how to do that than today i'm here to tell you how to do that. 


Steps for tracing any ip address are as follow:

Step 1. First you need to know ip address which you want to trace. For knowing website ip address read how to find website ip address.

Step 2. Now go to website http://www.iptrackeronline.com/.


Step 3. Now enter your ip address in the field and click Submit button.


Step 4. When you click submit, it will display you all the info related that ip address.


This also trace that ip address in map.


 You can also zoom to get more specific detail about that ip address.


How to change your ip address

There are lot of situation when you want to change your ip address. You can change internal ip address of your system while you can't change external ip address. For changing external ip address you have to contact ISP (Internet service provider). Today i am gonna tell you how you can change your internal ip address on windows machine.

Steps for changing your internal ip address are as follow;

Step 1. Go to start button and type CMD or press Windows +R and enter CMD and click Enter.


Step 2. Now to change your ip address type ipconfig /release 


Step 3. Now after that type ipconfig /renew and click Enter. This  will renew ip address of your system.


that's it, your ip address had changed. Finally type exit to close the window.

How to ping any ip address

In computer networking, ping is a specific method for sending messages from one computer to another. It is mostly used to check whether the system is up and running or not. Ping is the name of a standard software utility (tool) used to test network connections. It can be used to determine if a remote device (such as Web or game server) can be reached across the network.

ping tools use Internet Control Message Protocol (ICMP). They send request messages to a target network address at periodic intervals and measure the time it takes for a response message to arrive.


Steps for ping any ip address are as follow:

Step 1. Go to start button and type CMD or press Windows +R.


Step 2. You can ping any internal ip address or any external ip address. You can also ping any website to check whether it's up or not.Now Type ping ip address in command prompt and hit Enter.
For Example:  ping 192.169.1.134  
                         ping 173.194.38.48 
                         ping www.google.com


Step 4. If you reply for the ip address you ping that mean that system or website with that ip address is up and running. A successful Ping command will return lines this display.


That's it for this tutorial.Enjoy...:)

How to find internal IP Address of any window PC

When you are connected in a local network, you are assigned with an internal ip address & when you are connected to internet than you are assigned with both internal ip address as well as external ip address. Internal ip address is used to connect within your local network while external ip address is used to connect outside of your own network. In lot's of situations you need to know what is your ip address and if you don't know how to find that than today i will tell you how to get your ip address.

Steps for finding internal ip address are as follow:

Step 1. Go to start button and type CMD or press Windows +R and enter CMD.


Step 2. Now Type ipconfig in command prompt and hit Enter.


Step 3. On clicking enter, This will display a list of your network connection information. Near the top of the list, look for “IPv4 Address” under either Wireless Network Connection or Local Area Connection (In my case my ip address is 192.168.1.100).


IP address is 4 sets of digits, with up to three digits per set. The typical internal IP address will look like: 192.168.X.X. That's it this tutorial, Enjoy...:)

Wednesday, 2 April 2014

Upgrading from Windows Vista to Windows 7 (custom installation).

When your current edition of Windows Vista can't be upgraded to the edition of Windows 7 that you want to use, you can still install Windows 7 by using the Custom installation option instead. However, the Custom option doesn't preserve your files, programs, or settings

Now let's directly jump into the steps for upgrading Windows XP to Windows 7:

Step 1. First of all you need to check out for minimum hardware requirements for installing Windows 7. For this you can read Minimum Requirement for installing Windows 7 Guide.

Steps 2. Next step for upgrading OS to windows 7 is to take Backup of all your data, Move all of your files to another hard disk.

Step 3. Now you are ready to upgrade your OS. You can upgrade your OS using DVD or bootable USB drive.Before this you need to know "How to change USB drive or DVD drive BIOS periorty" For DVD you need to insert DVD in DVD writer and for USB drive you need to know "how to create a bootable USB drive".

Step 4. When you insert Windows 7 DVD or USB Drive than you first get this screen.


Step 5. After selecting Language, Time & Keyboard settings click Next and following screen will come.


Step 6. Now Click on Install now. Now it will take couple of seconds to start the setup.


Step 7. After that accept the terms and condition to proceed.


Step 8. Now you have to select Custom (Advanced) to upgrade xp to windows 7.


Step 9. Select the drive in which you want your OS to install and Click Next (In my case it's only one drive as i am working on VM for demo purpose).


Step 10. Now Windows 7 will install all necessary files and this step take a while So have patience.


Step 11. After required files installed, enter User name and Computer name and click Next.


Step 12. Now enter password an hint for your password.


Step 13. Now enter serial key in order to activate windows 7.


Step 14. Now Windows will prepare desktop for first time usage.


Step 15. Finally Windows XP is upgraded to Windows 7, Enjoy ..... :)


Upgrading from Windows Vista to Windows 7 (Step-By-Step Tutorial)

Depending on your hardware and your current edition of Windows Vista, you can use the Upgrade option during Windows 7 installation to upgrade from Windows Vista to a corresponding or higher edition of Windows 7. For more information, see Windows 7 system requirements.


Upgrading is the most convenient way to get Windows 7 on your computer, because it keeps your files, settings, and programs from Windows Vista in place.
If your current edition of Windows Vista can't be upgraded to the edition of Windows 7 that you want to use, you can still install Windows 7 by using the Custom installation option instead. However, the Custom option doesn't preserve your files, programs, or settings. For a step-by-step tutorial on how to perform a custom installation, see Upgrading from Windows Vista to Windows 7 (custom installation).
Steps for upgrading Windows Vista to Windows 7 are as fallow :
Step 1. First of all you need to check out for minimum hardware requirements for installing Windows 7. For this you can read Minimum Requirement for installing Windows 7 Guide.

Steps 2. Next step for upgrading OS to windows 7 is to take Backup of all your data, Move all of your files to another hard disk.

Step 3. Now you are ready to upgrade your OS. You can upgrade your OS using DVD or bootable USB drive.Before this you need to know "How to change USB drive or DVD drive BIOS periorty" For DVD you need to insert DVD in DVD writer and for USB drive you need to know "how to create a bootable USB drive".

Step 4. When you insert Windows 7 Disk than you have following screen with option to install and Check Compatibility online. First go with Check Compatibility online and if you are already done with that you can Click on install now.


Step 5. After you click install now you get the following screen.
Step 6. Remember before starting the process that you’re connected to the Internet because during this step you’ll want to get the latest updates for the install.


Step 7. Wait while the latest upgrades are found.


Step 8. Now agree Software Terms and conditions. At the type of installation screen, select Upgrade and not Custom. Custom would be used if you’re doing a clean install.


Step 9. The upgrade process begins…


Step 10. There will be about three or four reboots while the process completes.After each reboot you should see different tasks on the list showing they have completed.


Step 11. After the final reboot you will see the message that setup is checking video performance.


Step 12. Type in your upgrade product key then select if you want to turn on automatic updates. also Set up your time zone, time and date. After this Select where your computer is located, which in our example is on a Home Network.

Step 13. The desktop will be configured and you can start using Windows 7 with all of your files and most settings intact. Not everything will be exactly how it was in Vista, so allow yourself time to go through and make the appropriate tweaks.


Step 14. Finally you have done upgradation of Windows Vista to windows 7. Enjoy...............:)