Wednesday, 2 April 2014

How To "Upgrade" from Windows XP to Windows 7 (Step-By-Step Tutorial)

Are you still using of Windows 7 and want to upgrade to Windows 7 Operating system than you are landed on the right place. There is no straight way to upgrade from Windows XP to Windows 7. You can upgrade from Windows XP to Windows Vista and from Windows Vista to Windows 7 but you can't directly upgrade  from Windows XP to Windows 7.

Now let's directly jump into the steps for upgrading Windows XP to Windows 7:

Step 1. First of all you need to check out for minimum hardware requirements for installing Windows 7. For this you can read Minimum Requirement for installing Windows 7 Guide.

Steps 2. Next step for upgrading OS to windows 7 is to take Backup of all your data, Move all of your files to another hard disk.

Step 3. Now you are ready to upgrade your OS. You can upgrade your OS using DVD or bootable USB drive.Before this you need to know "How to change USB drive or DVD drive BIOS periorty" For DVD you need to insert DVD in DVD writer and for USB drive you need to know "how to create a bootable USB drive".

Step 4. When you insert Windows 7 DVD or USB Drive than you first get this screen.


Step 5. After selecting Language, Time & Keyboard settings click Next and following screen will come.


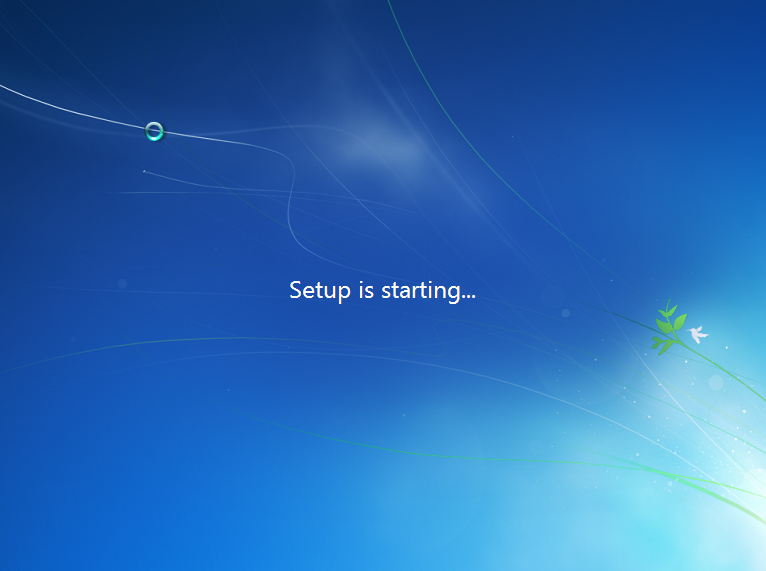
Step 6. Now Click on Install now. Now it will take couple of seconds to start the setup.

Step 7. After that accept the terms and condition to proceed.


Step 8. Now you have to select Custom (Advanced) to upgrade xp to windows 7.


Step 9. Select the drive in which you want your OS to install and Click Next (In my case it's only one drive as i am working on VM for demo purpose).


Step 10. Now Windows 7 will install all necessary files and this step take a while So have patience.


Step 11. After required files installed, enter User name and Computer name and click Next.


Step 12. Now enter password an hint for your password.


Step 13. Now enter serial key in order to activate windows 7.


Step 14. Now Windows will prepare desktop for first time usage.


Step 15. Finally Windows XP is upgraded to Windows 7, Enjoy ..... :)


Tuesday, 1 April 2014

Windows 7 and it's Installation

Windows 7 is computer operating system developed by Microsoft and released on October 22, 2009. Microsoft released Windows 7 after failure of windows Vista in the market. Microsoft released Windows 7 with lot of new features in Windows 7 that made it as one of the most successful Operating System from Microsoft. Windows 7 is widely used in Industry as well as on personnel computer. 

Windows 7 have three version which is commonly called as "Service Packs". Windows 7 released 3 service packs. For detailed information on Windows 7 service packs Click here

Windows 7, a major release of the Microsoft Windows, is available in six different editions: Starter, Home Basic, Home Premium, Professional, Enterprise and Ultimate. Only Home Premium, Professional, and Ultimate are widely available at retailers. For detailed information on Windows 7 editions Click here.

For installing Windows 7 there are minimum hardware that is to be needed. Minimum requirement for installing windows 7.

The table below lists common ways to install Windows 7, and links to more information on the Windows Website.
If you want to do thisGo here for more information
Install Windows 7 on a computer running Windows XP.
Go to Upgrading from Windows XP to Windows 7.
Install a 32-bit version of Windows 7 on a computer running a 32-bit version of Windows Vista.
Install a 64-bit version of Windows 7 on a computer running a 32-bit version of Windows Vista.
See "Installing a 64-bit version of Windows 7 on a computer running a 32-bit version of Windows" later in this topic.
Install a 32-bit version of Windows 7 on a computer running a 64-bit version of Windows Vista (less common).
Install a 64-bit version of Windows 7 on a computer running a 64-bit version of Windows Vista.
Install Windows 7 on a computer and format the hard disk during installation.
See "Using the Custom installation option and formatting the hard disk" later in this topic.
Install Windows 7 on a computer without an operating system.
See "Using the Custom installation option if no operating system is installed" later in this topic.


Windows 7 service packs

Windows 7 Service packs 1 (SP1) was released on march 18 2010. It was lot more than a rollup of updates and hotfixes. Windows 7 got lot of popularity with service pack 1. Windows 7 Service Pack 1 (SP1) is an important update that includes previously released security, performance, and stability updates for Windows 7. SP1 also includes new improvements to features and services in Windows 7, such as improved reliability when connecting to HDMI audio devices, printing using the XPS Viewer, and restoring previous folders in Windows Explorer after restarting.

Just as Microsoft used to release it updated version in 2-3 years. After service pack 1 Microsoft released Windows 7 service pack 2 for Windows 7. Windows 7 comes with lot of hotfixes for underlying problems. In service packs 2 lots of bugs that are reported in windows 7 service pack 1 are solved. Feature which are added in Windows 7 service pack 2 are :
  • Direct support for USB 3.0.
  • Support for wireless Bluetooth technology.
  • Improved performance for wi-fi connection.
  • Improved indexing and searching capability.
  • Improved recording TV using Media center.

After a while of release of Windows 7 SP2, service pack 3 comes in market with more bug fixes. But currently Microsoft has added all the fixes in SP1 (according to microsoft).

Windows 7 Editions

Microsoft released Windows 7 in six different editions: Home Basic, Home Premium, Professional, Enterprise and Ultimate.  Home Premium, Professional, and Ultimate are widely available at retailers. Users who wish to upgrade to an edition of Windows 7 with more features can then use Windows Anytime Upgrade to purchase the upgrade and to unlock the features of those editions. 

Main editions of Windows 7 are discussed as under :

  1. Windows 7 Starter
Windows 7 Starter is the edition of Windows 7 that contains the fewest features. It is only available in a 32-bit version and does not include the Windows Aero theme. Windows 7 starter can only run three programs at a time.

2. Windows 7 Home Basic
Windows 7 Home Basic is available in "emerging market". this version adds better graphics and Internet connection sharing to the Starter edition.
Some of the features Home Basic has over Starter are the ability to run more than three applications at once; a 64-bit version; thumbnail previews from the taskbar; and Mobility Center, which allows you to manage the various networks that you connect to with your laptop.

3. Windows 7 Home Premium
This edition contains features aimed at the home market segment, such as Windows Media Center, Windows Aero and multi-touch support.
Built to fill most consumers’ needs, this version includes programs for watching and recording TV on the PC as well as for creating DVDs from videos.

      4. Windows 7 Professional
This edition is targeted towards enthusiasts and small-business users.It includes all the features of Windows 7 Home Premium, and adds the ability to participate in a Windows Server Domain. Additional features include support for up to 192 GB of Random access memory ,operating as a Remote Desktop server, Encrypted File system, Presentation Mode, Software Restriction Policies.

      5. Windows 7 Enterprise
This edition targets the enterprise segment of the market and is sold through volume licensing to companies which have a Software Assurance contract with Microsoft.] Additional features include support for Multilingual User Interface (MUI) packages and BitLocker drive encryption.

      6. Windows 7 Ultimate
Windows 7 Ultimate contains the same features as Windows 7 Enterprise, but unlike the Enterprise edition, it is available to home users on an individual license basis.

Microsoft has said that OEMs will be able to pre-install Windows 7 Ultimate on new machines and that there will be limited availability in retail.

Minimum requirement for installing windows 7

If you want to run Windows 7 on your PC, The following table shows the minimum hardware requirements for Windows® 7 as provided by Microsoft:


Minimum 32-bit Operating System
Minimum 64-bit Operating System
Processor
1 GHz or faster 32-bit (x86)
1 GHz or faster 64-bit (x64)
Memory
1 GB RAM
2 GB RAM
Available Disk Space
16 GB
20 GB
Graphics
DirectX® 9 graphics processor with WDDM or higher driver

These minimum requirements are for basic computing tasks such as word processing and Web browsing. Additional memory and graphics may be required for more powerful computing tasks.
Additionally, the following are the minimum hardware requirements for running Windows 7 in Windows XP Mode:
  • Processor: Intel® VT or AMD-V™
  • Memory: 2 GB (32-bit), 3 GB (64-bit)
  • Available Disk Space: 15 GB
Additional requirements to use certain features:
  • Depending on resolution, video playback may require additional memory and advanced graphics hardware
  • Some games and programs might require a graphics card compatible with DirectX 10 or higher for optimal performance
  • For some Windows Media Center functionality a TV tuner and additional hardware may be required
  • Windows Touch and Tablet PC require specific hardware
  • Homegrouprequires a network and PCs running Windows 7
  • DVD/CD authoring requires a compatible optical drive
  • BitLocker Platform Module (TPM) 1.2
  • BitLocker to Go requires a USB flash drive
  • Music and sound require audio output
Product functionality and graphics may vary based on your system configuration. Some features may require advanced or additional hardware.
Microsoft has an Upgrade Advisor tool to assess whether a system is prepared for a Windows 7 installation. You can obtain the Upgrade Advisor from the Microsoft Download Center, or visit the Windows 7 Upgrade Advisor Web page.

Sunday, 9 February 2014

How to change Windows 7 Logon screen

Hey Guy's don't you get bored of same Log on screen? If you love customization like me and would like to add add some of your own image in place of boring log on screen then you are at the right place. Today i will tell you how to change Log on screen image.
Following are the steps to change your logon screen image.

Step 1. Click on "Start button", Go to "Run" prompt (Windows key + R).


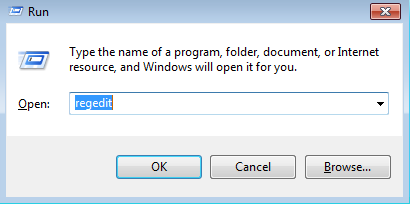
Step 2. Type "regedit" and click Enter.


Step 3. New window will open as shown below.


Step 4. Navigate to Following path

HKEY_LOCAL_MACHINE\SOFTWARE\Microsoft\Windows\CurrentVersion\Authentication\LogonUI\Background

Also Read:


Step 4. Now change value of "OEMBackground" 0 to 1. you can do so by right clicking on "OEMBackground". Once value changed to 1 Click OK.


step 5. Now open the path 

C:\Windows\System32\oobe


Step 6. Create a new folder name "info". Also create a new folder  "Backgrounds" in inside info folder.


step 7. Now copy paste your own image in that folder and rename the image to “backgroundDefault.jpg” and refresh the PC.


Step 7. Finally press windows key + L now you can see your own Logon screen.


Also Read:

How to UnHide a Disk Drive in "My Computer" (Step by Step tutorial)

Sometime for privacy purpose if you need to hide some Drive of your computer then you are at the right place.Today i will tell you how to hide Drive in My computer. Following are the steps to hide Drive in My Computer.

Step 1. Click on "Start button", Go to "Run" prompt (Windows key + R).


Step 2. Type "gtedit.msc" and click Enter.


Step 3. Local group policy window will open.


Step 4. Follow the path

User configuration > Administrative Template > Windows Component > Windows Explorer


Also Read:

Select "Windows Explorer" root folder and see the list in right side of window.


Note. You can also switch to standard tab to get the better view.

Step 5.From the list select "Hide these specified Drive in my computer" from the list.


Step 6.  Double Click "Hide these specified Drive in my computer" and then a new window will open.


 Step 7. In this window select the "Enable" option at the top. Click on Apply and then click OK.


Step 8. Now Go to My Computer and you will see that the Hidden Drive is visible now.


Step 9. As you can see D drive is back now. Enjoy Folks.

How to Hide a Disk Drive in "My Computer" (Step by Step tutorial)

Sometime for privacy purpose if you need to hide some Drive of your computer then you are at the right place.Today i will tell you how to hide Drive in My computer. Following are the steps to hide Drive in My Computer.

Step 1. Click on "Start button", Go to "Run" prompt (Windows key + R).


Step 2. Type "gtedit.msc" and click Enter.


Step 3. Local group policy window will open.


Step 4. Follow the path

User configuration > Administrative Template > Windows Component > Windows Explorer


Also Read:

Select "Windows Explorer" root folder and see the list in right side of window.


Note. You can also switch to standard tab to get the better view.

Step 5.From the list select "Hide these specified Drive in my computer" from the list.


Step 6.  Double Click "Hide these specified Drive in my computer" and then a new window will open.


 Step 7. In this window select the "Enable" option at the top and then Select the Drive which you want to hide. Once you had select the drive, Click on Apply and then click OK.


Step 8. Now Go to My Computer and you will see that the specified Drive is hidden now.


Step 9. As you can see D drive is not there. Enjoy Folks.

To have the hidden Drive back in My Computer click here.

Also Read:

Tuesday, 14 January 2014

How to hide Files in Images

There are number of cases when you want to hide some to your private file from prying eyes. You can hide any type of file like Text file, .exe file, .mp3 file or .avi file in Image file .You can also hide more then one file inside single image.

In order to do this task you need to have either WinZip or WinRAR installed in your computer. If you don’t have installed any one of these then download it from here and installed it.


Following are the steps for hiding Files in image:

Step 1.  Create a folder and add all the files in it you want to hide.

Step 2. Also add the image in same folder which you want to hide all of your files.

Step 3. Now select all the files and compress them with WinZip or WinRAR.

Step 4.  Now you have folder with Compressed folder with all the files you want to hide and Image.

Step 5. Now here is the Trick start. Click on Run and type CMD and hit Enter key.Now you can see Command prompt window open.


Step 6. Now type in “cd \” without quotes to go to root directory.


Step 7. Now enter the folder in which all the files are placed by entering “Cd  Folder path”.

Step 8. Now type the following lines

Copy /b imagename.jpg + filename.rar  finalimage.jpg

Note:

Replace imagename.jpg with the name of the images in which you want your files to be hide.
Replace filename.rar with name of your file you want to hide. It must be in .rar format.
Replace Flleimage.jpg with final image which contain all your hidden files in it.

Step 9.  Now when you open newly created image finalimage.jpg, it opens as normal image file.
Follow the steps to unhide the hidden files.

  • Open WinRAR.
  • Now Locate your image and open with it.
  • Extract the file and you are done.

Friday, 29 November 2013

How To Reveal Hidden Passwords (Asterisks) In Web Browsers

This is the very first trick that i had learn a long back. By using this you can view any saved Password in any Web-browser.

Following are the steps to View Password behind asterisk :

Step 1. Open the website where password is saved by the user. Here I’ll take the case of  Facebook.


STEP 2. Right click on password field.


Step 3. Then Click on inspect element.


Step 4. When you Click on inspect element then screen will be like this as shown below.


Step 5. Now look at the code window that look like this as shown below.


Step 6. Now change type="Password" to type="text" as shown below.


Step 7. Done, as you change password to text,  asterisk or dots in Password field will changed to Plain text.


 Don't try to Enter my Password, I had changed it after the demo.For any queries , Leave comments below.

Also Read: